
Valve Spring Installation & Measurements
Installing Performance Valve Springs?? Read this First!
Intro
A valve spring inside a motorcycle engine running at 13.000 RPM (nothing special nowadays) is highly compressed 108 times per second while battling the forces of valvetrain inertia and possible resonance. Because they are the most stressed component of any engine, particularly when modified, we should take extra care and measure some valvetrain dimensions during assembly.
So what are the most important aspects of valve spring installation?
1. Valve Spring Installed Height
2. Coil Bind and Clearance
3. Spring Pressure / Force
1 - Valve Spring Installed Height
Spring installed height is the most important measurement to be taken before any assembly takes place and is key when installing valve springs.
The installed height of a valve spring is the distance from the spring base to the bottom of the retainer when the valve is closed.
At this height, the valve spring will supply the Seat Pressure or Force.

When using double springs, each of them has a different installed height and in this situation the specified installed height refers to the outer spring.
This measurement is taken when the valve, spring base, retainer and keepers are assembled in the cylinder head.
How to measure installed height:
There are many ways to measure the valve spring installed height.
Method 1 – Valve Spring Micrometer
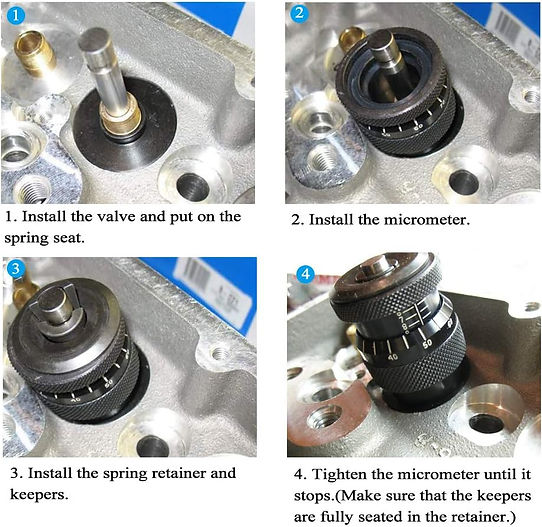
Valve Spring Micrometer in V8 Head - Lots of Space
This is obviously the most accurate method, but motorcycle cylinder heads are very small and tight, even more so in modern engines and most of the times there is simply no space for the micrometer, and even if you can find a micrometer small enough you will not be able to read the scale because of all the other cylinder head material around it.
So, we must look for an alternative, somewhat less accurate method.
Method 2 – Calculating Spring Installed Height
This method is based on a calculation where we subtract various amounts from the valve stem protrusion.
Valve stem protrusion is the distance from the cylinder head (the actual head casting) to the tip of the valve, when the valve is closed. This can be measured with a dial caliper, for example.

Measuring Stem Protrusion with Dial Caliper
After measuring stem protrusion, we will subtract the various amounts to arrive at the valve spring intalled height:
Valve Spring Installed Height = SP – SBT – VT – RT – SS
SP – Stem Protrusion
SBT – Spring Base/Seat Thickness
VT – Valve Tip to Top of Retainer Distance
RT – Retainer Thickness
SS – Spring Shims (if they are used)
This method works well but needs some practice to get all the dimensions right.
Method 3 – Measuring Sticks
The final method is the simpler one and it involves cutting some measuring sticks (out of 3,2mm or 4,0mm TIG welding rod) for example.
All the parts in the head must be assembled, except for the springs of course and we need to make a stick with the correct length to fit snuggly between the retainer and the spring base. After this we only need to measure the stick and this is our installed height.

Sometimes simple is better (no spring base/seat because head is cast iron)
Because the installed height between all the valves may vary we might need to make several sticks around the correct length to check all the valves, but this is not too difficult anyway.
Why do we need to measure Spring Installed Height?
Valve Spring Installed Height has a direct effect on the seat and open pressures, maximum valve lift, coil bind clearance and valve seal clearance.
Installed Height can also change over time – as the head is used and the valve seats are machined during engine reconditioning, the valves get ‘deeper’ into the head and the installed height increases accordingly.

Valve seat machining increases installed height
To readjust the installed height back to manufacturer specification we must use spring shims placed below the valve spring base. These steel shims come in various thicknesses.
Spring Shims are your friend!
Valve spring shims can also be used to increase seat pressure and open pressure as well as adjust coil bind clearance (more on that later).
2 - Coil Bind and Clearance
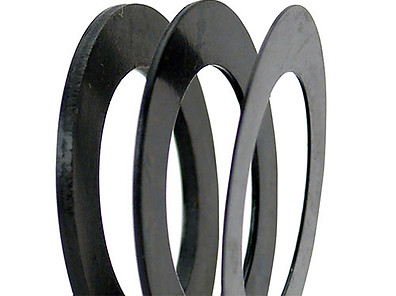
Coil bind happens when the spring is totally compressed to its minimum length. This length is also known as solid height because when the spring reaches this point it becomes in essence a solid body and its rigidity becomes infinite.
We must avoid coil bind at all costs because when the spring becomes a solid body the results are devastating to the whole drivetrain and the engine will probably not survive the experience.

Coil Bind = NO BUENO!
Because coil bind is catastrophic for the engine we must always stay away and keep adequate clearance to avoid this situation.
Usual minimum bind clearance is around 1,0 to 1,5mm or 40 to 60 Thou. However, each builder has their own opinions on this.
In order to verify coil bind clearance and properly avoid coil bind we must know:
-
Spring Installed Height (verified not theoretical)
-
Maximum Valve Lift (check camshaft specifications)
-
Valve Spring Solid Height
To measure Valve Spring Solid Height we can use a valve spring tester but if that is not available a good old vice will work great.

Regular Vice and Calipers to the rescue
In order to check if the bind clearance is enough we can use the following formula:
Installed Height – Max Cam Lift > Coil Bind Height + Clearance
Coil Bind Clearance
Coil Bind Clearance is one of those things where you can have too much of a good thing and here is why:
Any spring is a very dynamic element and subjected to continuously variable and cyclical forces. This makes them particularly prone to resonance – which is a form of vibration that produces an exaggerated movement of the spring coils, leading to greatly increased spring loads that can result in lower spring life or even breakage.

Springy – A spring susceptible to extreme resonance
This is a very complex subject from a technical perspective and many things contribute spring resonance, but the important point is we must avoid it or find ways to minimize it.
The valve spring manufacturer can use various methods to decrease resonance – stiffer springs, spring dampers, interference between springs, variable pitch springs, variable diameter springs (beehive or conical)…
The engine builder can also reduce resonance probability by avoiding excessive coil bind clearance.
In essence, if we have small clearance between the coils at maximum valve lift, the spring coils will be very close to each other so any oscillation will result in contact between them. This contact will immediately dampen the vibration and stop the resonance.
_gif.gif)
Spring Resonance is real and dangerous
Aftermarket springs generally allow for higher valve lift than the original springs. This means the valve spring solid height is smaller than the OEM Springs and that the coil bind clearance will be larger, if valve lift remains the same.
Therefore, if you don’t increase the valve lift when installing the stiffer springs, you will end up with more coil clearance, sometimes too much.
In these situations, valve spring shims are the answer. These steel washers or shims are placed below the spring base and reduce the installed height and as well as the coil bind clearance. Consequently, the seat pressure and open pressure will also increase.
So, what should our target coil bind clearance be? This is a matter of preference but a good range to aim for is 1,0 – 2,5mm.
3 - Spring Pressure / Force
Now that we know our installed height and checked our coil bind clearance, we must look at Valve Spring Pressure or Force.
Valve Spring Pressure or Force refers to the force exerted by a valve spring at specific positions during its operation in an engine.
It is a critical parameter that ensures proper valve function, timing, and reliability at various engine speeds – too little pressure and the valve bounces and floats, risking catastrophic damage, too great and the result is excessive valvetrain wear and lost horsepower.
Valve spring pressure or force is typically measured in Pounds (lbs), Kilogram-force (Kgf) or Newtons (N) and varies according to how far the spring is compressed.
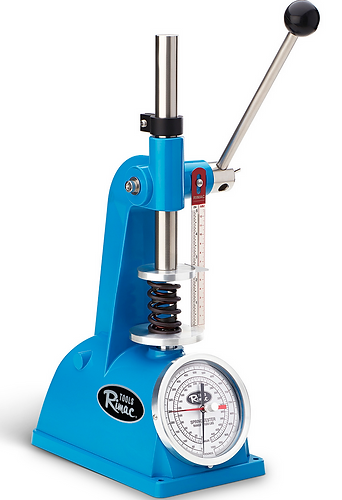
Rimac Valve Spring Tester - The Grandaddy of Testers
Seat Pressure: The force exerted by the spring at the Spring Installed height - when the valve is fully closed and seated against the valve seat.
Open Pressure: The force exerted by the spring when the valve is fully open, compressed by the camshaft's maximum lift. Normally the spring manufacturer will supply this force at a certain lift – 10mm for example.
It is the spring manufacturer’s responsibility to supply springs that match the specifications but if you have the tools available, double checking is always best.
Even if you don’t have a valve spring tester and must trust the supplier specifications, you must always verify the spring installed height to see if it matches the supplier specification. If not, some spring shims might be needed to adjust the height accordingly.
4 - Conclusion
I hope everyone can appreciate the hard life of a valve spring and the extreme cyclical loads they are under with a relatively small margin of safety so great care should be taken when assembling them.
Therefore, before installing any valve spring we should at least measure the installed height and coil bind clearance. Spring pressure or force is harder because you need specialist tools.
This is just another step in the blueprinting process to ensure the performance and longevity of our engine.
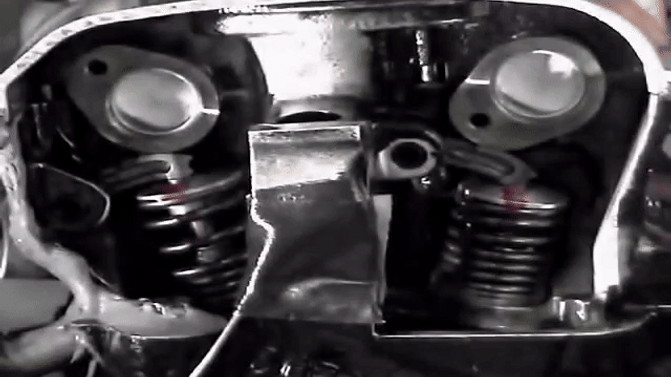
BMW S1000RR Cylinderhead punishing its springs